Thursday, January 27, 2011

Trim for my Chanel-Style Jacket

The fusing is complete (insert cheer here) and I have done a bit of sewing.  Next up the decisions on the trim, I am going to use self-fabric trim, probably two layers.  I thought I would do a bit of internet research first.  I found a great articleSusan Khalje article on the Threads site.  Also, Lindsay T shows using the trim for a faux sleeve vent, might need to use that one.

Threads has an article November 2005 #121, "Inside The Chanel Jacket" (this is just a link to the overview of the article).

Finally, the post has to have a picture, Chanel jacket, heavy fringe (NOTE- this is not my jacket but an actual Chanel jacket found on the web - credits under photo)
Photo from Kats Luxury
I am not making my fringe quite so thick and heavy.

Off to make fringe.

Tuesday, January 25, 2011

Fusing Interfacing

I am working on my Cabi inspired (Chanel inspired) jacket and I am fusing interfacing.  It is hard to stay focused on this job, a very important job but not too exciting job.  I am itching to sit at the sewing machine to start construction.


Picture from Cabi site

But first a couple of tutorials I am using and thought I would share:
Pam Erny posted this one today (thanks so much Pam)
Spot Fusing vs. Block Fusing (January 25, 2011 entry)
and I am using this set of pictures from Ann Rowley's flickr set


Okay, back to the ironing board.


On a side note, Meredith is in a brace(4 to 6 weeks), fractured bone in her wrist, fell in a basketball game last night and fell onto her hand.

Sunday, January 23, 2011

Valentine's Cards

I spent part of the afternoon making some Valentine Cards.  Most of the elements for each card were made using my Silhouette.


Well, this one isn't a valentine card but made it Saturday morning and wanted to share it


Here is the inside:


Another one -using a paper package from bo Bunny called Crush for many of these cards


The Silhouette has the ability in put in sketch pens and you can draw different shapes or words with the pens.  This is how I did the wording on the cards.


The topiary design was the free weekly design,

This one might be my favorite


Tomorrow plans are to start on my jacket from Cabi inspiration

Saturday, January 22, 2011

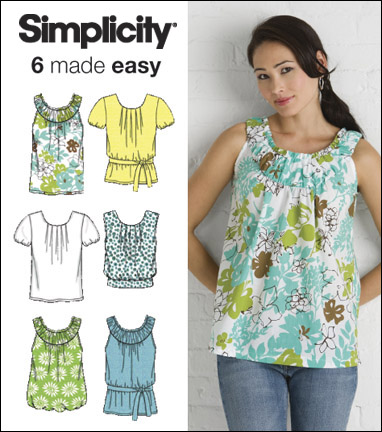
Simplicity 2892

I had a bit of the leopard blue print left, so I made another top from this Simplicity pattern.


I have made this before here at Pattern Review  and  blogged here and a white one, blogged here

So here is this one


I used self-fabric to make a neckband.  Didn't want to use facings as the pattern instructed, especially on a knit.  Plus the top is loose, so the neckband helps to pull the neckline closer to the body.


Here it is with the Jalie cardigan and a belt.

Friday, January 21, 2011

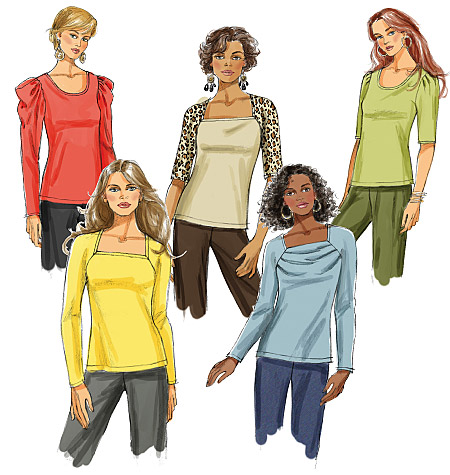
Butterick 5525

Description: Close-fitting, pullover tops with neckline variations.  Long or below elbow length sleeves.


Sizing: 6 to 20

Instructions:  They are pretty good,

Likes/Dislikes:  All the different sleeve variations is the reason I purchased this top, then I go and make one with the basic sleeves, go figure.  I didn't like how wide the neckline was.  This might be in part due to the size I made.  I went up a size because my fabric is polyester but feels and acts like a rayon jersey.   I feel rayon jersey is a bit clingy and I didn't want the top clinging me.  I probably should have used my regular size in the shoulders and then graded a size bigger in the bust and waist and hips.


Changes:  I didn't like the pleating on the View C - the pleats are folded up, I changed this to fold them down.  Here is a close-up:


 Also, the neckline was very big on this shirt.  I knew I would not wear it as is and added some 1/8" elastic to the neckline.  The instructions have you turn in the neckline and stitch the hem.  This hem had a natural casing so I inserted the elastic to help draw in the neckline.  The front of the shirt has its own facing, so you are only hemming three sides, this leaves a small opening between the front and sleeve in the hem to insert the 1/8" elastic.  Make sense?
A picture of the neckline, you can see a bit of the gather


Fabric:  A jersey from Gorgeous Fabrics.  She has it available in a different colorway

Conclusion:  The shirt is bright, so I will probably always wear it with a cardigan or jacket but I do like the pattern and am anxious to try View D.

I finished  Jalie 2919 today and think the two look great together.  Here is original review for 2919 and orginal blogpost.


The fabric for this Jalie is a thin sweater knit from Joann's.  I bought all that was left, so I had to cut the collar band half the pattern width. 

Tuesday, January 18, 2011

Zippers and storage

Today is an exciting day, my second oldest daughter starts student teaching, secondary math.  We were talking on the phone last night and she asked me to make her a case of some kind, similar to the jewelry rolls I made in December.  She wanted the case to hold binder clips, paper clips, etc.  She needed those things at school and at home to grade, prepare lesson plans,  and other teacher things.

Well, this is what I came up with - notice the great number fabric for the math teacher.  It closes a like a CD case


She wanted 4-5 zipper pockets, the middle ones are only attached at the bottom. 

There are zipper pockets on each side. 


I am anxious to hear how this works out. 

Today, Lynne posted a great bag she made for her knitting. 

Monday, January 17, 2011

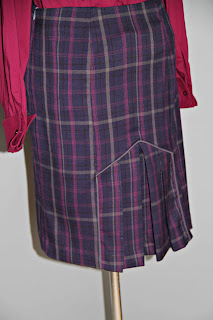
McCall's 5523 - Again

Here is the review of the first skirt and here is the blogpost from the first skirt.

Here is a highlight - I made a different view using fabric from Joann's,  a suiting with a bit of stretch.

I found while taking some pictures, this must be my colors, as I have several garments to wear with this skirt.  You will be sick of pictures after seeing all of them on this blogpost.

Here it is with a blouse, take a close look at the matching of the plaid on the front piece and side front pieces.  warning: You aren't going to see that in the back

Here is the back - the top part is matched fine - but the inset, guess who forgot to match the plaids!  Then not enough fabric to recut.

I decided to use some piping around the inset.  I am not sure if it is better or worse but I am sure I am leaving it. 

 Close-up of piping, and I see a thread I forgot to trim.
 then a cowl sweater that looks pretty good.
 Then my cardi-wrap and tshirt:
 Next a sweater
 the tshirt only with the skirt.  BTW, the skirt fits me much better, my dressform does not have a waist adjustment.  My waist is not this small, darn the luck :)


this might be my favorite, with the long sweater vest

Now to get past the inset non-matching issue and wear this skirt.

This isn't all the possibilities either, look what came today:


My fabric.com order and I really must be hooked on these colors!

Thursday, January 13, 2011

Card Making

A few months ago I purchased a Silhouette Machine and have been enjoying it.  My use of this machine has increased the last couple of weeks, as the twins and I have set up an extra bedroom for scrapbooking and crafting.  I am able to leave my Silhouette out and I really have been able to learn more about this machine.  I am amazed how much you can do with the Silhouette and the software.  Each Monday, on the Silhouette Blog, there is a tutorial.  I try to work through each tutorial, just to learn the software a bit better.  Another great feature, is a weekly free design and the blog always has a cute way to use the free design.

In the evenings, I have been making some cards.

From the weekly design this week - I used all the bits and pieces to make these three cards:


Here is one more - just cut using some punches

Wednesday, January 12, 2011

Questions and Answers

If someone leaves a comment with a question, I always try to email them with an answer.  There have been several the last few posts, so I thought I would answer in a post.(answers are in italics)

On Vogue 1197

Jeanette posted:
I love your new top! And, the smaller cowl. How much did you reduce it?

It is the cowl from the short sleeve view.

Sunfli posted:
The cowl on you doesn't look as low as on your "dummy" or on pattern envelope picture. I really like the neckline on you. Did you adjust that?

I did not adjust it, I do think you could take a 1-2" from the width of the cowl.  This would pull the neckline closer to the body.  I think it is close to a 1:1 ratio cowl to neckline.


On my McCall's Cape
Gail posted:
How easy would it be it make a lining for added warm and comfort?


It is very easy to add a lining, in fact, I there are one or two reviews on Pattern Review with some instructions. 
 
BTW, The gloves came from Coldwater Creek orginally $29.99 on sale for $9.99.
 
On My Image Carigan:
My Summer Touch posted:
Did it take long time to make?
 
It really didn't take long to make.  Buttonholes took the longest.
 
 
***********************************************************************************
 

Thank you all for the wonderful comments on my garments, I really appreciate the comments and your time to post them.

Happy Sewing.

CSI Winter Theme

I felt my dining room needed some different artwork, here is the piece I had in the room.  Too much spring-like, my room needed something more tranquil.

I painted two canvases wtih Benjamin Moore's Quiet Moments (had a small test jar).  Then cut out this tree (called Winter Tree) with my Silhouette machine.  The trunk is silver vinyl and to my surprise, I had no white vinyl, so I cut out several snowflakes from white cardstock.  I used Modge Podge to adhere the snowflakes.  Since the vinyl doesn't like to adhere to the canvas in places, I used Modge Podge over the top of the entire piece to keep the design down. 


Here they are together
One more view:

Inexpensive artwork for the room and it was fun to give it a quick change.

I am sharing this on
Visit thecsiproject.com

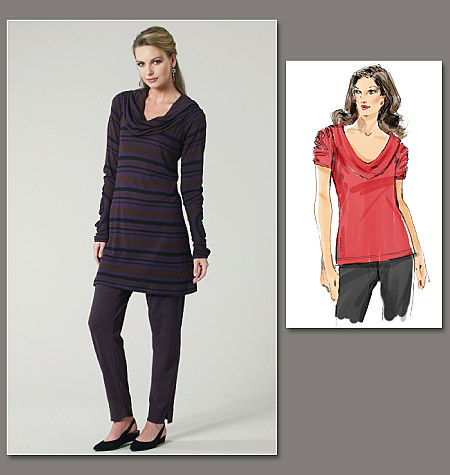
Vogue 1197


Description: Semi-fitted, pullover tops A, B in two lengths have raglan sleeves shirred with elastic and two cowl variations, optional contrast cordless piping. Close-fitting, 1" seam pull-on pants C with side slits and elastic waist. All have stitched hems.


Pattern Sizing: Misses and Women's sizes based on bust 32-55.

Instructions: It is Sandra Betzina - they are great, of course.

Likes/Dislikes: Ever since reading Ann's Review and her blog post, I knew I needed this pattern.  I liked ruching, the neckline, the lengths.  My only dislike, I was short of fabric and had to make some changes to the sleeves.

Changes:  I had to shorten the sleeves due to lack of fabric.  The sleeves are shaped lik a "J" and the ruching is the lower part of the "J".  This shape takes quite a bit of fabric and I just ran short.  I cut the long length and later decided that wasn't a good look on me, so darn I could have had those long sleeves!  After adjusting the length on the sleeves, I added some ruching on the sleeves.  Another fabric, constraint was the smaller cowl neck.


Fabric:  A knit from Fabric.com purchased on a whim.

Conclusion:  A great top with wonderful features, quick to make and can be a great piece for your wardrobe
If you want to make view B, have 2-1/4 to 3 yards for your top.  I had just under 2 yards.
Here is Sandra Betzina's version

My top on dress form:


Cowl neck:

 Sleeve Detail


Top on me:
 This is how I wore it to work on Tuesday:
 Belted, like this much better than no belt when wearing the top only:
 thought I would try the jacket, trying to do some of the looks from Cabi Canary not sure I like it, what do you all think?
********************************************************************************

Thank you all for the wonderful comments on my cape, I so appreciate it.

Tuesday, January 11, 2011

McCall's Cape - More pictures

Took a couple pictures wearing my new cape:


I found long gloves at the mall, just what I needed for this cape:

Sunday, January 09, 2011

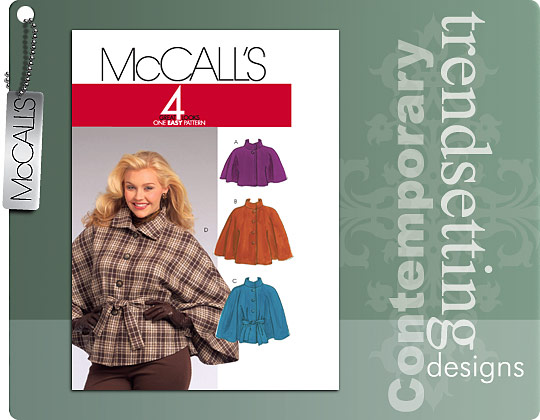
McCall's 5764

Description:  Loose fitting, unlined, waist or hip length capelet has collar variations and front buttonhole and button closures; capelets C, D have belt and faced openings and back loop for belt; capelet D has optional topstitching on collar.

I made view D.


Sizing: 8 to 18 and 18W to 24W

Instructions:  The instructions are for an unlined cape.  I wanted add a lining, so I didn't follow all the instructions

Likes/dislikes:  I wanted to make a capelet, thought this would look very nice with anything from skirts to jeans and boots.  This pattern had good reviews at PR, so I thought I would give it a try.  I wanted a capelet with a belt, which this McCall's pattern had. 

Changes:  I added 2" to the length.  With this change, I lowered the belt openings and belt loop by 1".  Also, I lined the capelet, not fond of wool directly on my skin, plus it just looks better.  I also  made welt buttonholes, using the instructions from Claire Shaeffer's High Fashion Sewing Secrets.  I have only made welt buttonholes once before, but this time I was quite pleased and feel I finally have an understanding of how to be successful making these.


Fabric:  A wool from fabric.com, lining from Fashion Fabrics Club

Conclusion:  I think this will be fun to wear and something quite different in my coat closet. 


I will get a picture of me wearing my cape this week.