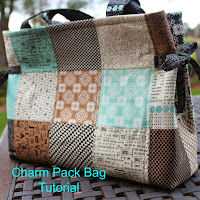
Tomorrow the finished Cooper will be on the Mood Sewing Network, so check out the finished project, it is a fabulous bag.
I have a blog post with some basic information about the bag and sewalong link. If you plan on making this bag the sewalong is fabulous, tutorials are good and you might want to purchase The Cooper Companion, an extra pdf full on photos and little extras for the bag. What type of extras? bag feet, self-fabric strap, key fob, etc. Well, worth the money.
Since Colette Patterns has such great tutorials, videos and The Cooper Companion, I really don't have too much to add on the constructions.
Here are a few tips:
I used a ruler when lining up the straps to make sure they were straight.
The magnetic snap......the instructions have you put the female snap on the bag. The flap is constructed next with the male snap on the flap. I had better luck, waiting on the female snap. I completed the flap, basted it to the bag and then marked the placement for the female snap on the bag. See the pink dot? That is my placement.
Waiting on the female snap makes it easier to line up the straps.
Next the pockets on the lining, which is quilting cotton.
First step is press the bag body and pocket in half, that way they will match up. Another perk, the pocket is perfectly centered.
Colette instructions have you press up the bottom edge of the pocket and just stitch to the body lining.
Instead I pressed up the bottom edge and drew a white chalk line on the body of the bag. This white line, which is the stitching line
Press the pocket up and pin in place
Edgestitch on the sides and bottom of the pocket. After edgestitching, stitch again a fat 1/4" and that enclosed the trimmed edge at the bottom of the pocket.
Finally, topstitch the center of the pocket, I always stitch from the bottom up, eliminates a pucker at the bottom of the pocket
Here is a picture of the lining in place

I have a blog post with some basic information about the bag and sewalong link. If you plan on making this bag the sewalong is fabulous, tutorials are good and you might want to purchase The Cooper Companion, an extra pdf full on photos and little extras for the bag. What type of extras? bag feet, self-fabric strap, key fob, etc. Well, worth the money.
Since Colette Patterns has such great tutorials, videos and The Cooper Companion, I really don't have too much to add on the constructions.
Here are a few tips:
I used a ruler when lining up the straps to make sure they were straight.
The magnetic snap......the instructions have you put the female snap on the bag. The flap is constructed next with the male snap on the flap. I had better luck, waiting on the female snap. I completed the flap, basted it to the bag and then marked the placement for the female snap on the bag. See the pink dot? That is my placement.
Next the pockets on the lining, which is quilting cotton.
First step is press the bag body and pocket in half, that way they will match up. Another perk, the pocket is perfectly centered.
Colette instructions have you press up the bottom edge of the pocket and just stitch to the body lining.
Instead I pressed up the bottom edge and drew a white chalk line on the body of the bag. This white line, which is the stitching line
I stitched on that pressed line and then trimmed to 1/4".
Edgestitch on the sides and bottom of the pocket. After edgestitching, stitch again a fat 1/4" and that enclosed the trimmed edge at the bottom of the pocket.
Finally, topstitch the center of the pocket, I always stitch from the bottom up, eliminates a pucker at the bottom of the pocket
Here is a picture of the lining in place


You've used such a nice combination of fabrics! I made a zebra print Cooper for my daughter during Colette's sewalong. It was the first bag I've ever made and I agree that between the pattern booklet and Cooper Companion that I had all the information I needed to create a very nice bag! I can't wait to check out your finished bag!
ReplyDeleteYour zebra print Cooper sounds amazing.
DeleteThis is looking fabulous, I'll have to go and check out the full post on mood to see the rest of your masterpiece!
ReplyDeleteThanks, Bri, I really enjoyed making this one.
Delete