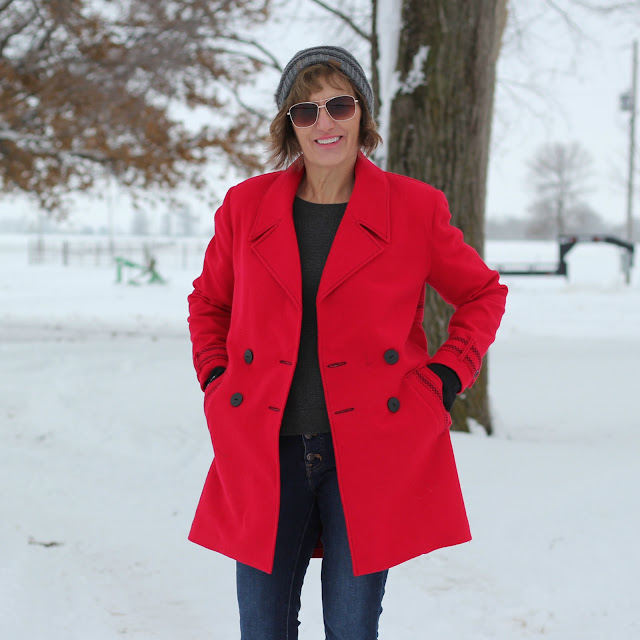
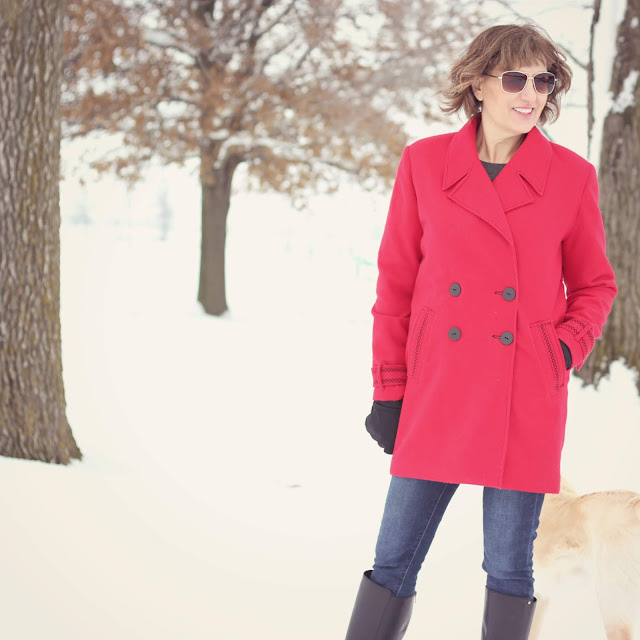
My new red jacket with some beautiful decorative stitches courtesy of my Pfaff Creative Icon.
I need to warn you, photo overload. I had some trouble getting photos showing the true red of the jacket. All the snow was throwing me off for camera settings, you will get several red shades in all the photos but this one is probably the closest to the true color.
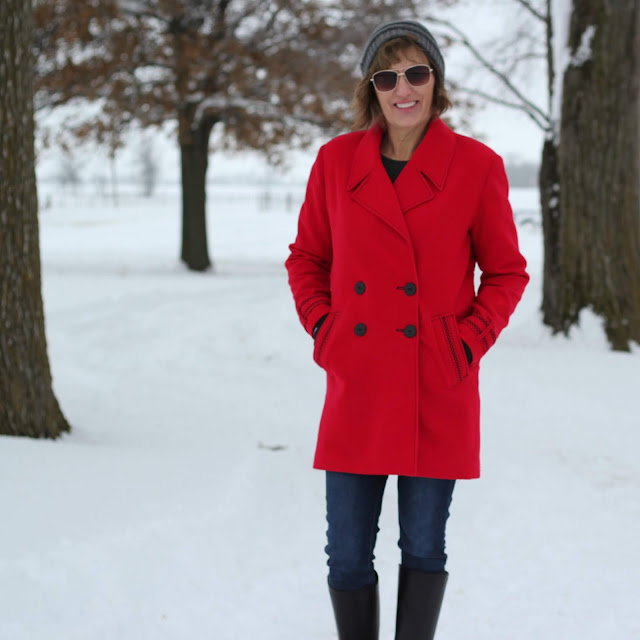
This pattern is Simplicity 8451, a Mimi G Style pattern and I love it. Today will be about the construction and tomorrow will be all about the decorative stitches and buttonholes in the hoop on the Pfaff Creative Icon.
After reading some reviews at Pattern review, I went with a size between a 12 and 14, in the armsyce, bust and then the rest of the pattern was a 12. Some of the reviews mentioned the garment was oversized. I don't usually make a muslin and this jacket was no exception. In the big 4 patterns I am usually either a 12 or 14 based on the finished garment sizes. I was a 12 with this pattern based on those measurements but I wanted my coat to have room for a sweater. One thing I have found with Mimi G patterns - the arms are short. I added 1.5" to the sleeve length and they are truly perfect.
The back overlay has a nice curve but I straightened my so I could do the decorative stitches in a straight row.
Interfacing is Fashion Sewing Supply Supreme Medium Weft fusible interfacing for tailoring as follows
- front and front facing
- upper sleeve
- sleeve hems
- collar - and undercollar
- back hem
- 2" at the bottom of the back overlay
- the sleeve tab
I did not do a back stay, with the back overlay, I felt there was enough layers. I did not use lining fabric for the underside of the back overlay. My lining is coat lining and it is heavy, the wool was lighter.
Oh, speaking of wool fabric, it is the oldest piece in my stash, I think I bought it at an online shop (now closed) called Fashionista Fabrics, maybe 7+ years. The wool is not heavy at all and sewed beautifully with the construction and the decorative touches. The lining is coat lining from Vogue Fabrics, nice and warm! In fact, I was so cozy taking these photos, I did not have to rush!
Thanks to a 20 inch snowstorm, I had plenty of time to make my coat, as the weekend was pretty much a stuck at home weekend. I loved that, sewing time! Did I mention how much I love it? Well, I do the fit is perfect, the color is fabulous and the black decorative stitches really pop.
I used embroidery thread for the decorative stitches and for the topstitching, which is a triple stitch. I documented my construction of this jacket on Instagram Stories and they are all in Highlights now.
The buttonholes were sewn in the hoop, as an embroidery design. This is a fabulous feature, it really makes each buttonhole perfect. I did not open the buttonholes on the sleeve tabs and the back vent. My thought.... I will never use those buttonholes, they are for looks only. The buttons are just sewn on top of the stitched buttonhole.
I did two changes with the pattern instructions. First, the topstitching for the label is a bit different, I just wanted to outline the edge of fabric. I went so slowly when I did the topstitching but did have to redo a few sections.
A second change was to add a buttonhole to the left side, instructions said only top left. Since I was doing black buttonholes which show up dramatically, I added another one. I wanted the balance when I wore the jacket open.
This was a fun and rewarding project, I had so much fun making this jacket. The embellishments were fun to sew and create and I really think they just make the jacket. What do you think?



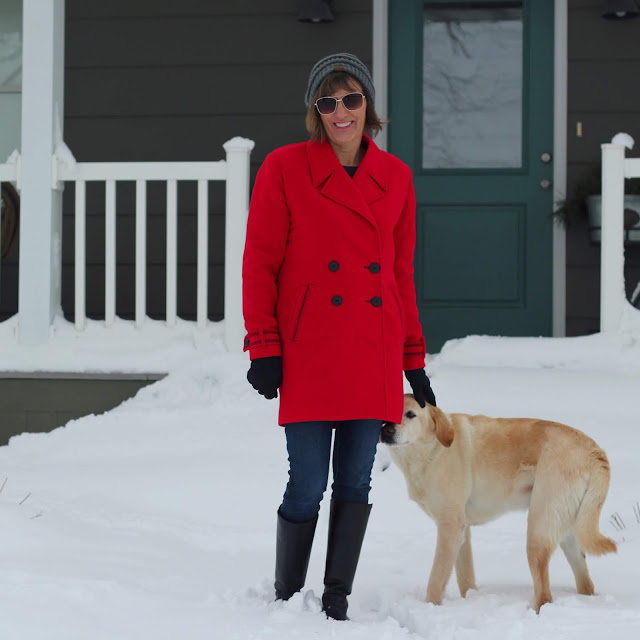


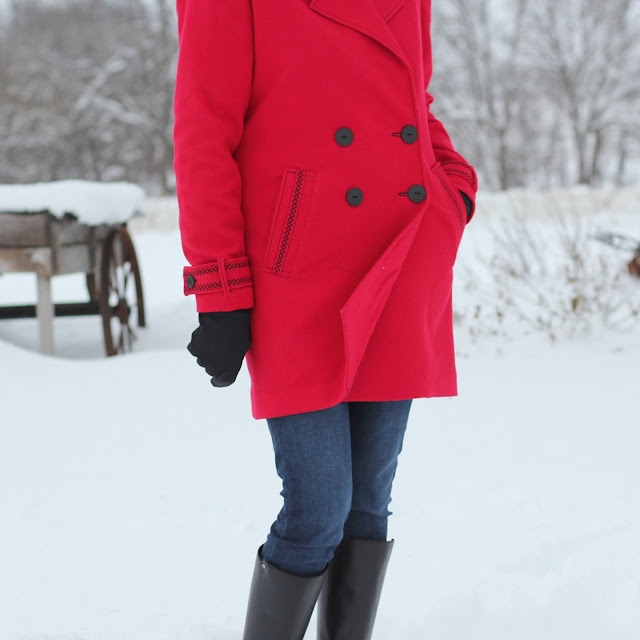



So many great details on this jacket - I love how you showcased those details with the embroidery. Such great inspiration!
ReplyDeleteThanks, Mary Ellen, it was so fun working and sewing on this coat.
DeleteThis looks so good! I love the stitching around the sleeves. Can you tell me what you did to prepare your wool before you started? Did you steam it, or did you just cut it thinking that you'll only use dry cleaning?
ReplyDeleteI steamed it and took my time and did a long steam on each section . Thanks so much
DeleteFantastic red coat - what a great look on a snowy day. I have a green wool peacoat that is that similar length and I find it really wearable - you will get so much use out of this coat.
ReplyDeleteThanks, Beth, I will love wearing this jacket. I also have loved your IG stories on creating your jacket.
DeleteWhat a beautiful coat Lori! The red color is so classic, and the decorative stiching just adds so much.
ReplyDeleteThanks, Lisa, I love this jacket and the pop of black is good, I think.
DeleteLori, your coat is beautiful and looks absolutely great on you. I'm looking forward to a snowed in weekend starting on Friday. ;-) Time for me to hide away in my studio.
ReplyDeleteThanks, Cennetta, I really like this one. We are suppose to get more snow this weekend.
Deletebeautiful!
ReplyDeleteThanks so much.
DeleteSuch a beautiful coat! Love the red with the black stitching. Great job.
ReplyDeleteThanks, Joen, this might be my favorite coat.
DeleteSmashing coat, Lori. I'm anxious to see your next post about the decorative stitches.
ReplyDeleteThanks, and the post just was written and will post tomorrow.
DeleteThis is stunning work!
ReplyDeleteWhat a gorgeous coat! Red's my favorite color and I'm feeling a bit jealous, wishing I had made this beauty. The fit is terrific, and I love how you incorporated the embroidery aspects so creatively. Brava!
ReplyDeleteWow Lori, this is one of the best coats I have ever seen! The colour, the fit... just gorgeous.
ReplyDelete